How To Create And Share Albums On IPhone: A Complete Guide
Sharing photos with friends and family has never been easier, especially when you know how to do a shared album on iPhone. With Apple’s intuitive Shared Albums feature, you can seamlessly collaborate and share your favorite memories with others. Whether it’s a family vacation, a birthday celebration, or just a collection of candid moments, shared albums allow you to curate and distribute your photos without hassle. This guide will walk you through everything you need to know about creating, managing, and customizing shared albums on your iPhone.
Shared Albums are part of the iCloud Photos ecosystem, ensuring that your shared content is accessible across all Apple devices. This feature is not only convenient but also secure, allowing you to control who can view or contribute to your album. As we delve deeper into the article, you’ll discover step-by-step instructions, troubleshooting tips, and creative ways to make the most of this powerful tool.
By the end of this guide, you’ll have a comprehensive understanding of how to do a shared album on iPhone and the confidence to use it effectively. From adding participants to customizing settings, we’ll cover all the bases to ensure you’re equipped with the knowledge to share your photos like a pro. Let’s get started!
Read also:Is Jackson Mahomes Gay Exploring His Life Career And Public Persona
Table of Contents
- What Is a Shared Album and How Does It Work?
- How to Create a Shared Album on iPhone
- Can You Customize Your Shared Album Settings?
- How to Add or Remove People from a Shared Album
- What Are the Benefits of Using Shared Albums?
- How to Do a Shared Album on iPhone: Advanced Tips
- Common Issues and How to Fix Them
- Frequently Asked Questions About Shared Albums
What Is a Shared Album and How Does It Work?
A shared album is a collaborative space within the Photos app on your iPhone where you can store and share photos and videos with others. Think of it as a digital scrapbook that multiple people can contribute to and view. The feature is integrated with iCloud, meaning that all participants with access to the album can view updates in real-time, regardless of the device they’re using.
Here’s how it works: when you create a shared album, you can invite others via a link or their Apple ID email address. Once they accept the invitation, they’ll be able to view the photos you’ve added. If you allow it, participants can also upload their own photos and videos, add comments, and like the content within the album. This makes shared albums an excellent tool for group projects, family gatherings, or even professional collaborations.
One of the standout features of shared albums is their flexibility. You can control who has access, whether participants can contribute, and even set notifications for when new content is added. This ensures that your shared album remains a personalized and secure space for your photos.
How to Create a Shared Album on iPhone
Creating a shared album on your iPhone is a straightforward process. Follow these steps to get started:
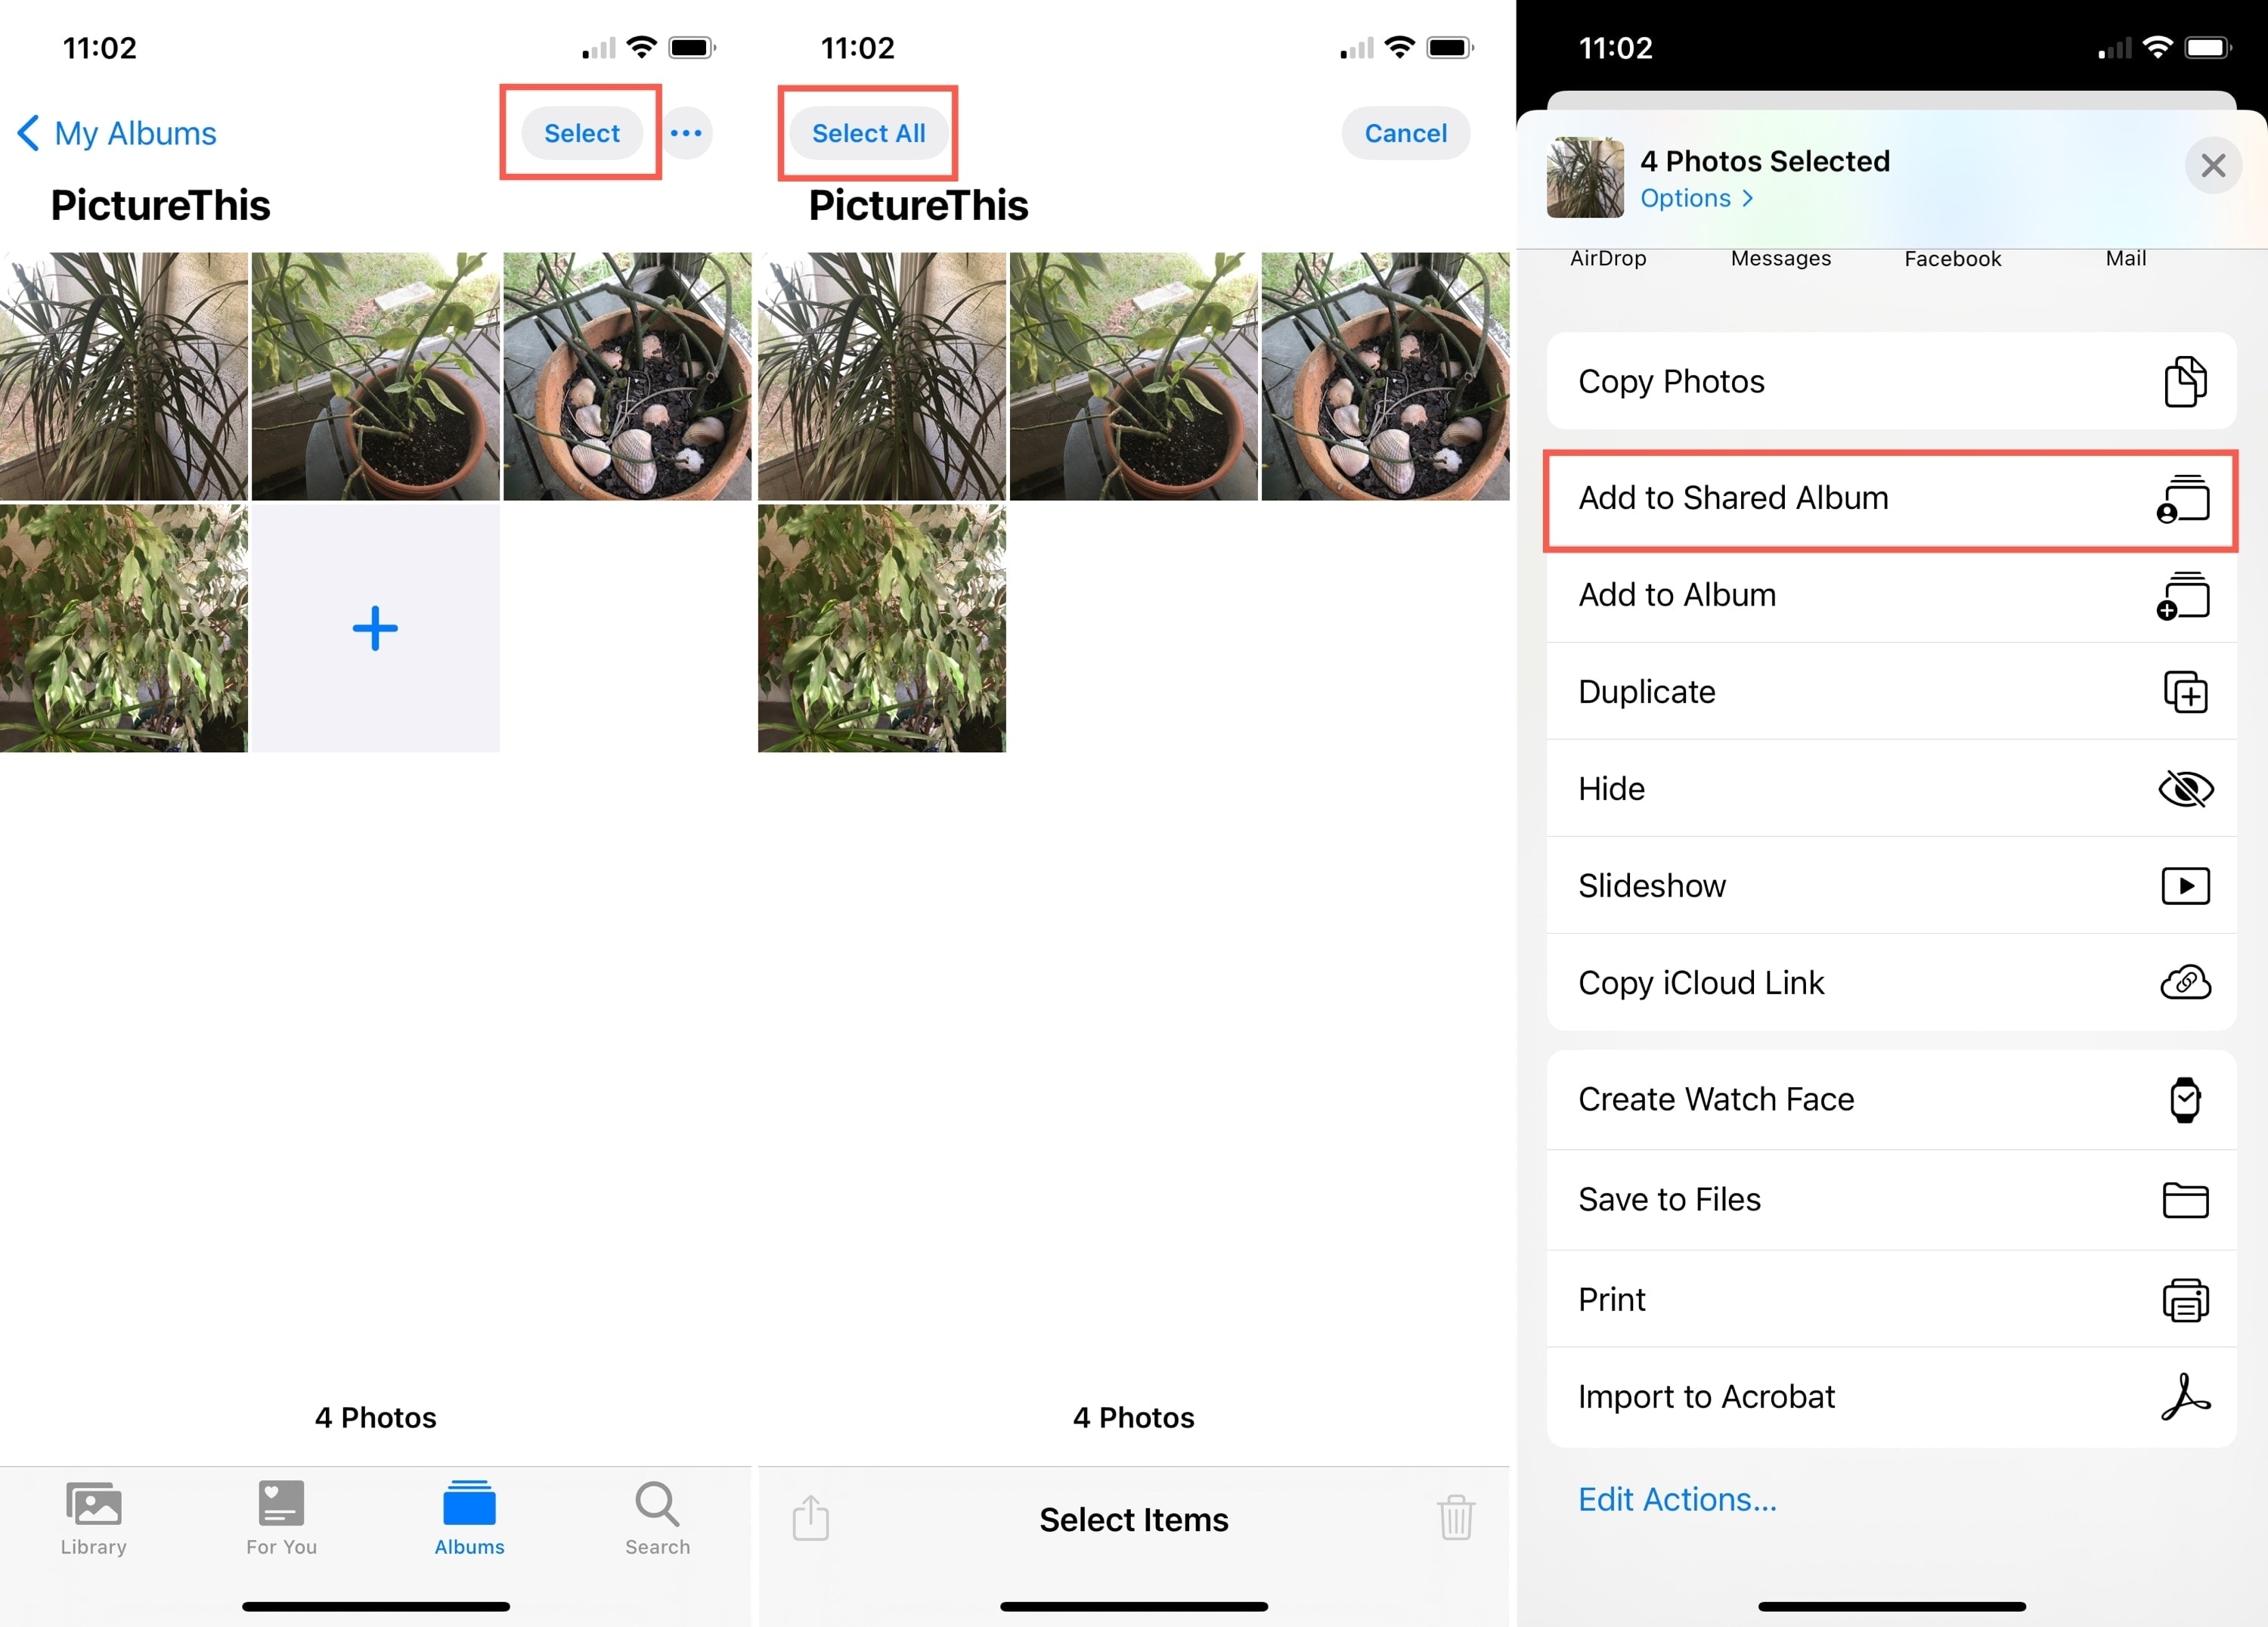
- Open the Photos app on your iPhone.
- Navigate to the Albums tab at the bottom of the screen.
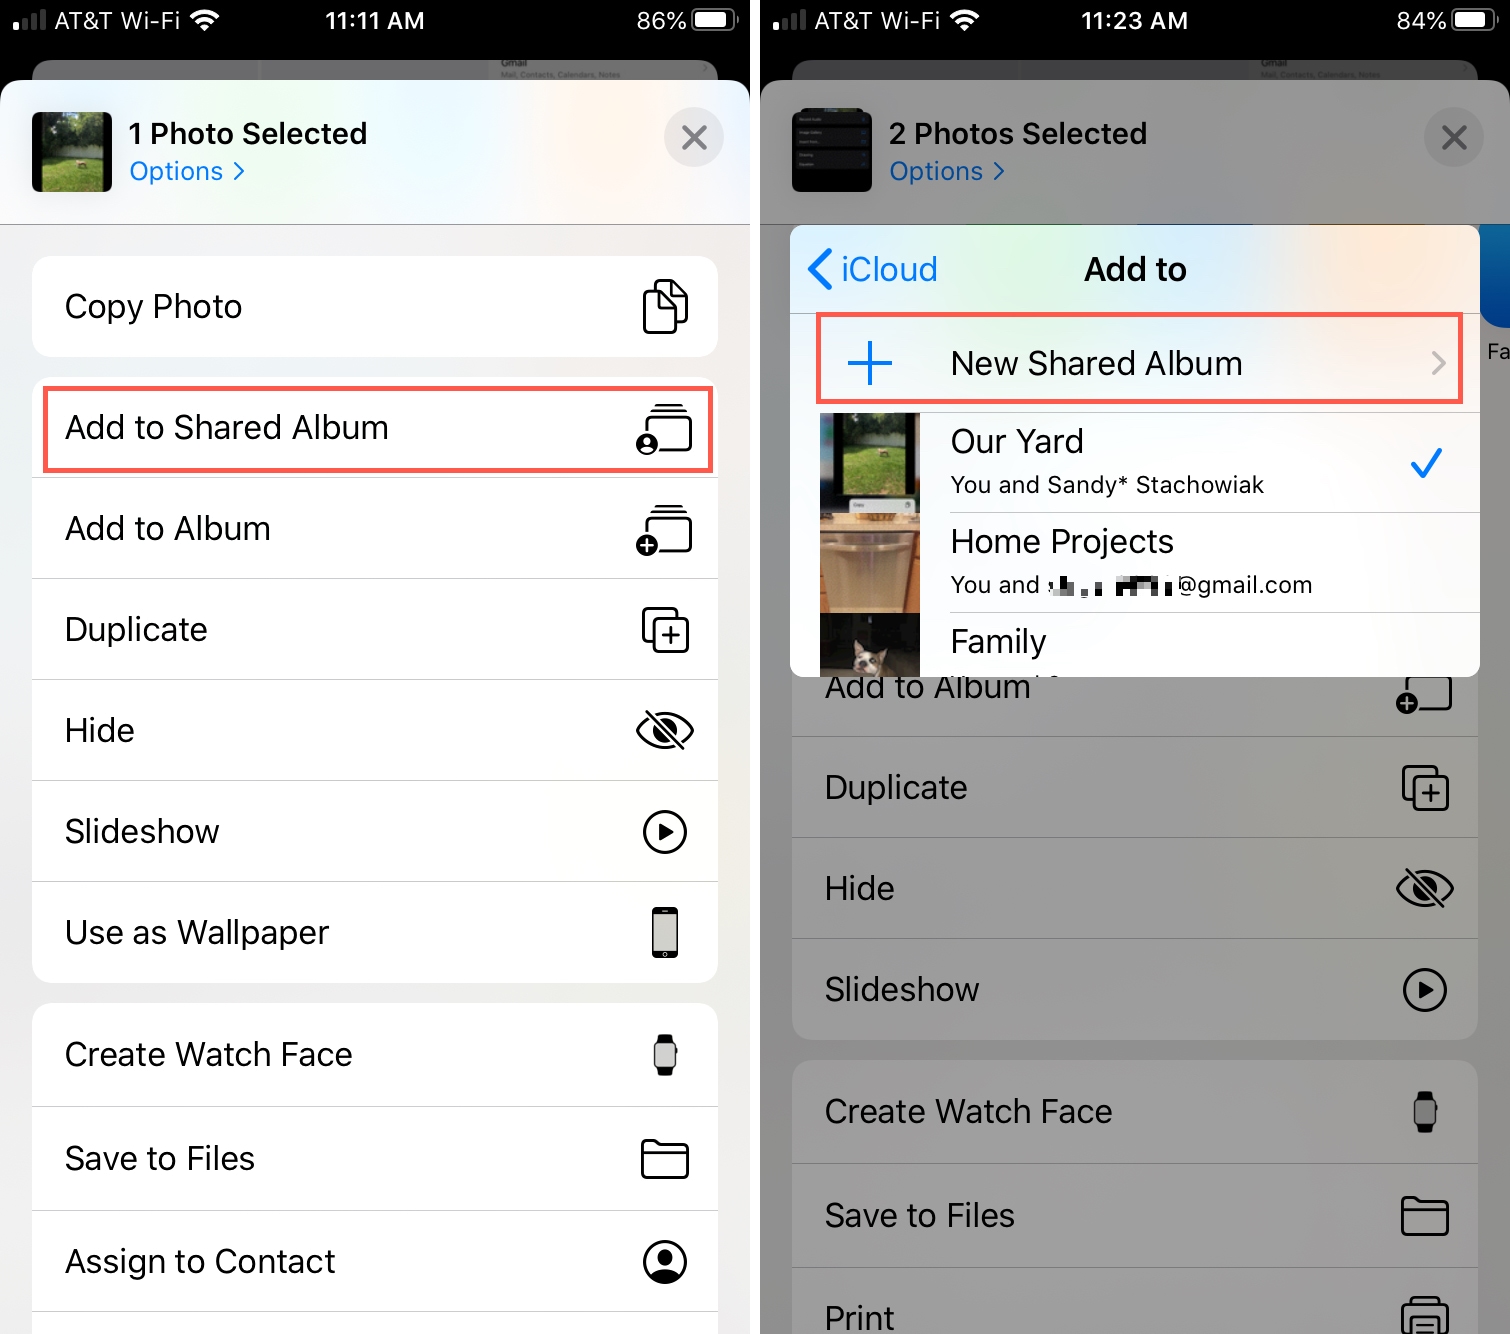
- Tap the + icon in the top-left corner and select New Shared Album.
- Give your album a name and tap Next.
- Enter the email addresses of the people you’d like to invite. You can also choose to share the album via a link.
- Tap Create to finalize the album.
Once the album is created, you can start adding photos and videos by tapping the Add button. You can also customize settings, such as allowing participants to post their own content or turning off public access. This flexibility makes shared albums a versatile tool for any occasion.
Can You Customize Your Shared Album Settings?
Absolutely! Apple provides several customization options to ensure your shared album aligns with your preferences. Here’s how you can adjust the settings:
Read also:What Kind Of Cancer Did Melanie Olmstead Have A Comprehensive Guide
How to Allow or Restrict Contributions
If you want participants to add their own photos, you can enable this option in the settings. To do so:
- Open the shared album in the Photos app.
- Tap the People tab at the top.
- Toggle the switch next to Subscribers Can Post.
How to Turn Off Public Access
If you prefer to keep the album private, you can disable the public link:
- Go to the People tab in the shared album.
- Toggle off the switch next to Public Website.
These settings give you complete control over who can view and contribute to your shared album, ensuring a personalized experience for everyone involved.
How to Add or Remove People from a Shared Album
Managing participants in a shared album is simple and can be done at any time. Here’s how:
Adding New Participants
To invite more people:
- Open the shared album and go to the People tab.
- Tap Add People and enter the email addresses of the new participants.
Removing Existing Participants
To remove someone:
- Go to the People tab in the shared album.
- Tap the name of the person you wish to remove and select Remove Subscriber.
These steps ensure that your shared album remains up-to-date and includes only the people you want.
What Are the Benefits of Using Shared Albums?
Shared albums offer numerous advantages, making them a go-to solution for photo sharing:
- Real-Time Updates: Participants can view new photos and videos as soon as they’re added.
- Collaboration: Multiple people can contribute to the same album, creating a comprehensive collection of memories.
- Accessibility: Albums are stored in iCloud, making them accessible across all Apple devices.
- Privacy: You have full control over who can view and contribute to the album.
These benefits make shared albums an invaluable tool for anyone looking to share and preserve their memories.
How to Do a Shared Album on iPhone: Advanced Tips
Once you’ve mastered the basics, you can take your shared album experience to the next level with these advanced tips:
- Organize with Folders: Create multiple shared albums and organize them into folders for easy navigation.
- Use Notifications: Enable notifications to stay updated whenever new content is added.
- Download Originals: Encourage participants to download high-quality versions of photos and videos for better clarity.
These tips will help you maximize the potential of shared albums and make your photo-sharing experience even more enjoyable.
Common Issues and How to Fix Them
While shared albums are generally reliable, you may encounter a few issues. Here’s how to troubleshoot them:
- Album Not Syncing: Ensure that iCloud Photos is enabled in your settings.
- Participants Can’t Access the Album: Double-check that they’ve accepted the invitation and are signed into iCloud.
- Photos Not Uploading: Verify that your device has sufficient storage and a stable internet connection.
By addressing these common issues, you can ensure a smooth and seamless shared album experience.
Frequently Asked Questions About Shared Albums
Can I Share an Album with Non-Apple Users?
Yes, you can share the album via a public link, which can be accessed on any device with an internet connection.
Is There a Limit to the Number of Photos in a Shared Album?
No, there’s no specific limit, but the album’s performance may slow down with an excessively large number of photos.
How Do I Delete a Shared Album?
To delete a shared album, swipe left on the album in the Albums tab and tap Delete.
In conclusion, learning how to do a shared album on iPhone opens up a world of possibilities for photo sharing and collaboration. With its user-friendly interface and robust features, shared albums are an indispensable tool for anyone looking to preserve and share their memories. Start creating your shared album today and enjoy the convenience and joy it brings!
For more information on iCloud and its features, you can visit Apple’s official iCloud page.
Understanding R6 Server Downtime: Causes, Impacts, And Solutions
How To Access Kilgore Blackboard Login: A Complete Guide For Students And Faculty
How Tall Is Shaw? Unveiling The Height Mystery
Apple photos shared album voxolpor
How to convert an album to a shared album in Photos on iOS and Mac
